mandag 31. desember 2012


photo 8 e1303322892766 12 Sweet Spring Wreaths to DIY
If you are looking for a touch of spring in your home decor, I think the quickest way is to DIY a wreath. I love making them because it’s a craft with relatively instant gratification, and you’ll find that is true of all these sweet spring wreaths. I’ve found 12 spring wreaths to make in a variety of styles, including fun and bright like this one from Dollar Store Mom. Seeking more spring wreath inspiration? Click through the jump to get some tutorials!
http://www.howjoyful.com/2012/07/nursery-felt-hot-air-ballon-mobile-tutorial-and-pattern/

stand nice and straight.  It also added a fun look. That’s it, took less than 5 minutes and now I have a fun little felt bouquet sitting on my hutch! 
If you want, you can even clip one of the flowers to a head band (I used some vintage lace)  or even pin it to your blouse to give yourself a cute little look for the day! These flowers are so versatile, so have fun with this DIY! 
Hope you enjoyed this easy crafty craft! What do you think of the felt flowers and bouquet?! I would love to see some other fun stuff you come up with, so feel free to share! 
XOXO, Lidy

DIY Bath Bombs

Love those awesome fizzing bath bombs but don’t want to spend $6 a piece?  It’s easy to make your own with natural ingredients that soften your skin.
As this recipe is part of the Natural Skincare Series the ingredients are natural and safe.  While there are many other recipes that recommend using synthetic fragrance and coloring, there are many options available that are 100% natural and will not harm you when absorbed into your skin.
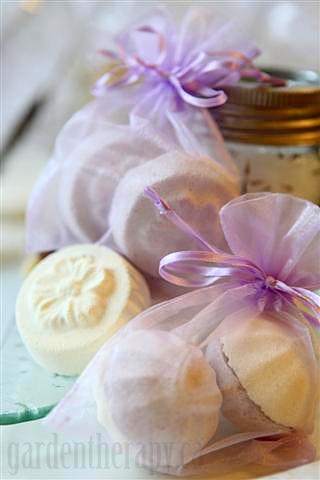
You can feel confident that when you use these natural products, or give them as gifts, that they are healthy for the body.
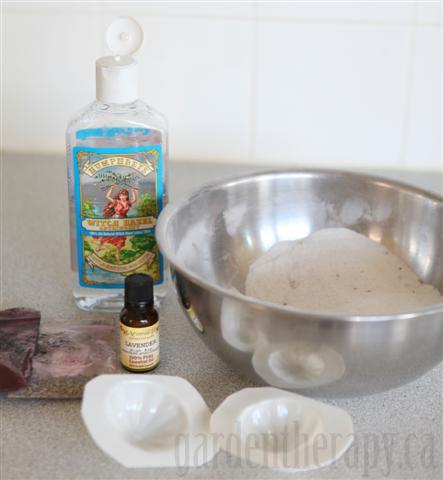
Ingredients / Materials:
  • 2 cups baking soda
  • 1 cup citric acid
  • 100% pure witch hazel
  • spray bottle
  • 10-20 drops of 100% pure essential oils (do not use fragrance for any bath or body products)
  • natural colorant (green=spirulina, yellow=turmeric, purple=ratanjot)
  • plastic moulds
Instructions:
1. In a large bowl, measure in the baking soda, citric acid and mix well.
2. Add a 1/2 teaspoon of coloring and mix well.  Add more colouring if you want a deeper colour, but keep in mind that too much coloring will leave a ring in your tub, so go easy.  The color will become more pronounced when you add the witch hazel anyhow.
3. Add 20-30 drops of essential oils and mix well.
4. Using an atomizer or spray bottle filled with which hazel, spray the entire surface of the powder mix and mix with your hands.  Keep spraying and mixing rapidly until the mixture holds together when scrunched with your hand (think of making snowballs).
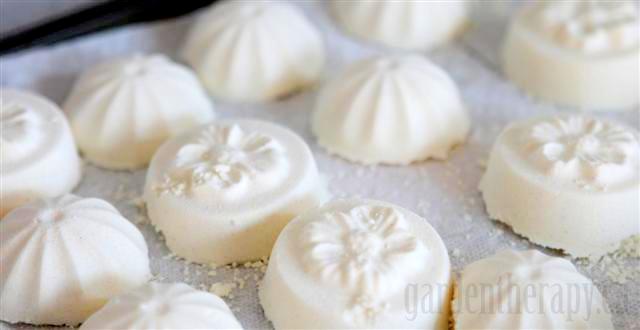
5. Working quickly, firmly press mixture into moulds.  You can use soap-making moulds, chocolate moulds, ice cube trays, or even plastic Christmas tree ornaments that snap into two parts.  The key is that they are plastic and large enough for the bath bomb to combine and set.
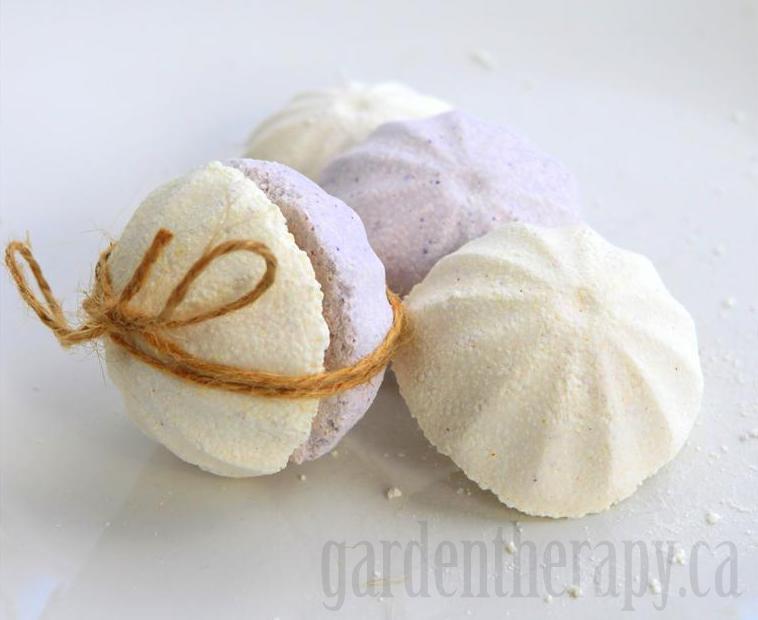
6. Gently tap the mould so that the bath bomb releases and carefully lay on a towel or tray to dry.  To make a round bath bomb, over-fill two moulds and press them together firmly before tapping the mould to release the bath bomb.
7.  Let the bath bombs dry for 30 minutes or until they are firm and won’t fall apart.
Tip: use the extra powder from the bowl and counter and shake it into carpets or rugs, then vacuum.  Instant deodorizing!

Fish Mobiles

A now for something oh-so darling: spoonfish wind chimes by North Carolina artist Neva Starr. You can find them over at her shop, Twisted Metals. The creations are made from vintage stainless steel dinnerware and add a playful and welcome touch to your outdoor space.
spoonfish by Twisted Metals / featured on dearestnature.com

ABOUT DONAVILLE HERRICK

Donaville is the Founder of Dearest Nature and also Co-Founder and Creative Director of Hello Hello Hi. When visions of nature and web design aren't dancing in her head, she enjoys spending time with her three munchkins, baking cupcakes, and trying her hand at various crafts. Follow her on Twitter to stay updated with her day-to-day musings.

How to design a Brooch Bouquet

I love brooch bridal bouquets!  If I were getting married now I would so carry one of these beauties down the aisle.  Brooch bouquets are amazing for so many reasons.  Let me count the ways: they are sparkly, they make meaningful keepsakes after the wedding, they are sparkly, you can use jewelry from family members and carry a bit of them with you down the aisle, you make your brooch bouquet well in advance of the wedding, you never have to worry about it not holding up throughout the day and they are sparkly.
Making a brooch bouquet is quite the DIY project!  It takes patience and creativity.  But it is a worthy endeavor.  Especially when you are ready to walk down the aisle carrying a beautiful brooch bouquet of your own making.
How to make a Brooch Bridal Bouquet:
Supplies:
50-85 brooches, large earrings or necklaces (I used 55 pieces.  ½ were jewelry pieces from my grandmother and great-grandmother and the other ½ I purchased on clearance at Michael’s)
2 feet 5 inch wide Midori taffeta ribbon in gold
3 yards 3/8 inch wide Midori velvet ribbon in almond
3 yards of clear and gold seed beads strung on wire
Scissors
Wire cutters
Needle nose pliers
Hot glue gun with glue
22-gauge green florist wire
Light green corsage tape
2 stems of inexpensive artificial hydrangea-light green
Choosing your brooches:
You should consider a few things when choosing the jewelry pieces you are going to include into your brooch bouquet.
1. Colors- Choose at least three but not more than five color families and stick to them.  I used shades of green, purple, turquoise and gold pieces with antique gold as my metal accent.
2. Finish- Choose one metal type.  I prefer to use either all shades of gold metals or all shades of silver.  I think it gives your finished brooch bouquet a more polished look.
3. Size- Pick jewelry pieces in a variety of sizes.  It will give your bouquet depth and dimension.
4. Sentimentality- You may want to include a few pieces of jewelry that have special meaning to you.  A brooch your grandma always wore, you and your fiancée’s initials or the earrings your mother wore on her wedding day would all be sweet additions.
5. Value- I would not use any jewelry pieces that are worth too much money.  The bouquet will be tossed around and set down all day long.  It would be terrible to loose a particularly valuable piece of jewelry.
6. Inspiration- If you have a brooch that you love use it to inspire to colors of the entire bouquet.
Step One: Wire and taping
Attach wire to your jewelry pieces. Since each brooch will be different you will need to alter your wiring technique for each piece.  For heavier pieces you will want to use a couple of pieces of wire.  The wired brooch should not droop when you hold it between two fingers otherwise it will not hold up in the finished bouquet.
Twirl the corsage tape down the wire pulling as you go.  The tape sticks best when gently pulled and is overlapping itself.  This will take some practice.  Be patient and take your time
The wired and taped brooch should be sturdy.  The tape finishes the wire, holding multiple wires together and adding some strength
Repeat until all your jewelry pieces are wired and taped.
Step Two: Assemble the brooch bouquet
Hold the hydrangeas in your left hand.  Insert your wired and taped jewelry pieces one at a time.  The hydrangea acts as a spacer and it fills in any gaps between the jewelry pieces so you cannot see the wires.  The hydrangea will be completely covered when you are done with your bouquet. Rotate the bouquet as you insert the brooches while maintaining a pleasing domed shape
After you have added all the wired brooches and have the bouquet in a shape you like, gather all the wire ends tightly together and wrap with the corsage tape to form the handle of the bouquet.
Step 3: Seed bead loops
Make 3-inch loops out of wired seed beads.
Continue looping until you are holding four loops.
Attach a long wire and tape the length.  Make a total of four seed bead clusters.
Collar the bottom of the bouquet with the seed bead loops.  Tape the wires in place down the handle of the bouquet.
Step Four: Ribbon collar and handle
Cut eight inches of the ribbon and set aside.  Grasp the remaining ribbon in two fingers on the end at the edge.  Hold the copper wire that runs the length of the ribbon and start pulling the wire, pleating the ribbon as you go.  Continue until the entire ribbon is ruffled.
Grasp the wire you used to pleat the ribbon at both cut ends.  Twist the wire together.
Run a bead of hot glue down the rough edges of both ends of the ribbon.  Press the glued ends together to form a seam.
Wrap the stem of the bouquet with the eight inches of ribbon you placed to the side.
Place the bouquet handle through the ribbon collar. And glue in place.
Wrap the seam of where the bouquet collar meets the handle in velvet ribbon.  Finish with a small bow and the gem headed pins.
The finished aisle worthy bouquet!
Another version of the brooch bouquet with fresh flowers included throughout the arrangement.
Brooch bouquet collared with fresh flowers.

do-it-yourself: snow domes - a tutorial

a few years back i was totally into snow domes (also known as snow globes). i made them all myself, out of little glass jars, with a little animal and tree inside. i just asked my mum whether she still has some of my old ones and if so i will add photos of them at a later point. i made 2 new ones today though. so here are instructions on how to make your own cute little winter decoration. and if you live in the southern hemisphere - you might enjoy the thought of them as well just to cool down a little :)

what you need:


clean glass jars with lid, please make sure they still close well, or you might get frustrated when everything is almost done and the glass leaks (i speak from experience), marmelade jars work well and small baby food jars are perfect for mini snow domes...
water-resistant glue
destilled water
glycerin (i bought mine at the pharmacy)
glitter flakes
little animals, cars, snowmen, trees, whatever you'd like in your snow dome (try the model railroad section in the toys department for trees i.e.) i find it's best to collect little things for the snow domes over the months instead of starting to search for something fitting when you want to make them...

what to do:

* glue the animals/trees etc. to the inside of the lid, making sure that you can still close the glass


* pour water and glycerin into the glass jar at a ratio of 1:1
* at this point you might try to put the lid onto the glass (make sure the glue has dried) in order to test how much you need to top up with water/glycerin
* add glitter flakes


* screw lid to glass really tight, turn around, shake, enjoy!


(um, well i have to admit, the toadstool one didn't work out - i was too much in a hurry and the glue hadn't dried yet, i'll have to re-do this one :(( so, yes, make sure the glue is dry and everything's fixed)


(you might want to glue the lid to the glass as well, but make sure to test if you're happy with the amount of water/glycerin and glitter before doing that!)

you have the option of putting a piece of fabric and twine around the lid to make the snow dome look a little more pretty :)

if you made a snow dome with this tutorial, we'd be happy to receive feedback here in the comments section. in case you share it on your blog, please leave a link so we can come visit and have a look at it!

DIY Fri: Map Card and Envelope

This two-piece stationary set is the perfect kitschy DIY project for the end of summer. You can make this for someone going on an out of town excursion, for your own travels, or to give with a present. I made a couple just 'cause they're cute!


Materials:
-An Old Envelope and Card
-Map(s) or Atlas 
-Pencil or Pen
-Scissors
-Glue Stick 
-1 Piece Of Card Stock or Construction Paper


Open up the old envelope. Be sure to go slow as to not rip the envelope too much to deform the shape. 


Trace the outline of the envelope on to your map or atlas page.


Cut the outline of your envelope until you have a duplicate, but in the map paper.


Glue the back side of the piece you just cut out to another piece of the map/atlas. Make sure to press and spread through the center outwards in order for the glue to stick. Re-glue edges if needed.


Cut out the envelope shape again following the edges of the piece you glued on.


Fold and crease the edges of the envelope inwards. 


Apply glue to the edge of the piece that will be folded up in the middle, connecting the sides to form the bottom of the envelope. 


Lay the side pieces on top of the edge you just glued. Press it firmly and then wait for it to dry before using.


Open up and trace your old card on to the piece of card stock or construction paper. Then, cut it out. 


Glue the piece of paper you just cut out to another piece of map/atlas. Press it down and spread from the middle outwards. Re-apply glue to the edges if needed. 


Fold the card in half and crease the middle. 


Tada! You're done. So easy and simple, and incredibly cool. 

This simple project is a great way to get the kids out in the garden for a little free labour…{ahem} I mean garden therapy.
Spring is the time to plant peas out in the garden.  Seeds germinate well in cool soil so plants have a strong start by the time summer hits.  I like to start my peas indoors then move the little vines out when they are strong enough, but you can also buy started pea plants at nurseries and farmers market this time of year.
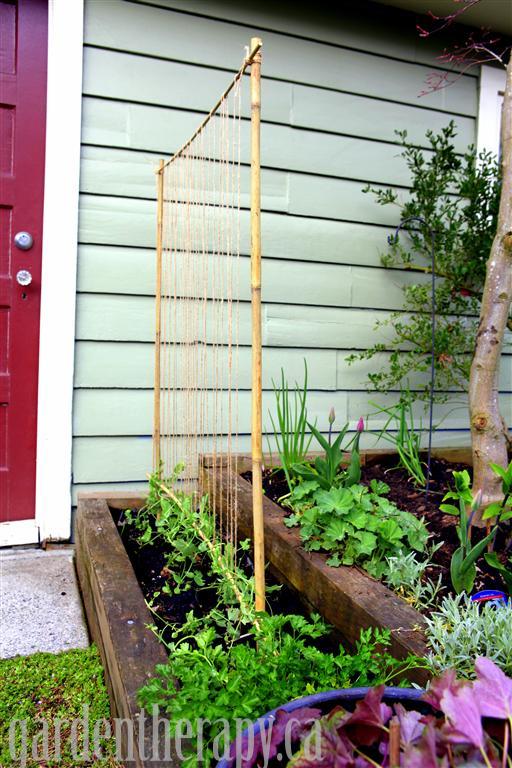
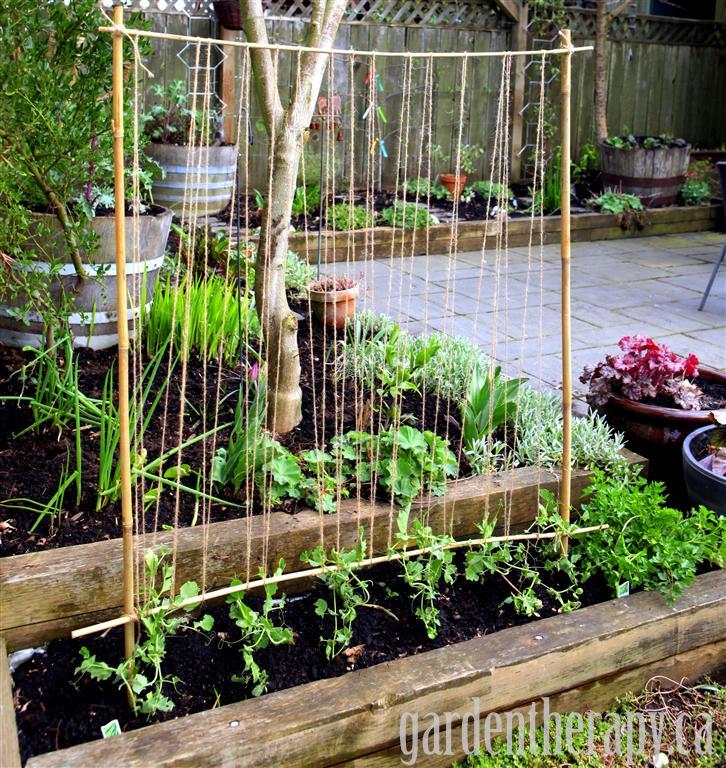
When you plant your peas they will start to ramble and tangle along the ground and the sweet tips get munched on by just about any vegetable loving creature you can imagine (slugs, snails, the darn dog!) so it’s nice to grow them vertically up a support.  The little vines cling and twine nicely around string, and this simple trellis is perfect to pack a lot of peas into a small area.

Materials:
  • Bamboo poles of various lengths
  • A spool of garden twine
  • A garden helper
Directions:
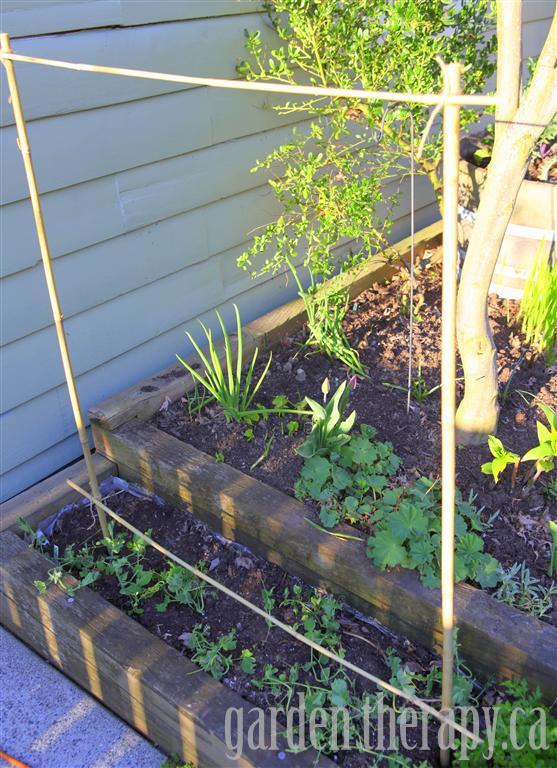
1. Stick two 6’ or longer bamboo poles into the soil on either side of your pea patch.
2.  Make a frame using two more bamboo poles that measure a few inches longer than the width of your side stakes.  Secure the poles together by tying twine around the poles where they cross in a figure eight pattern.
3. Using twine on a spool, tie one end of the twine to the bottom of one side of the bottom of the frame.  Run the twine up and over the top of the frame, and allow to drop back down.  Let your garden helper wind the twine around the frame over and over until you have reached the other side. Tie the twin in a knot on the end of the frame to secure.
4. Gently lift the tips of the pea plants and tuck their tendrils onto the twine.  The peas will take it from here.